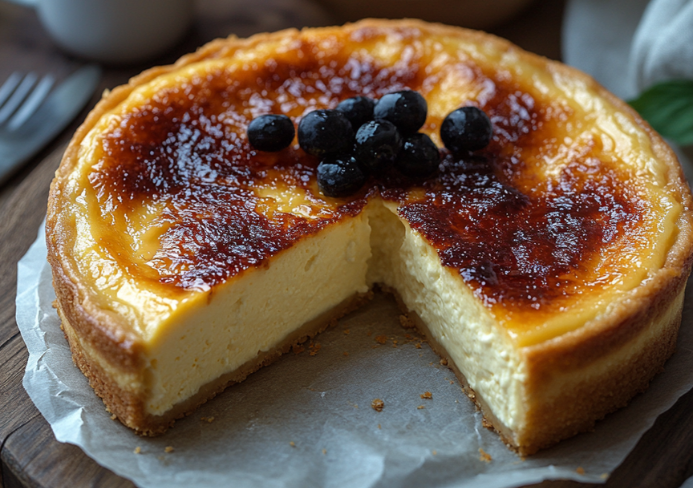
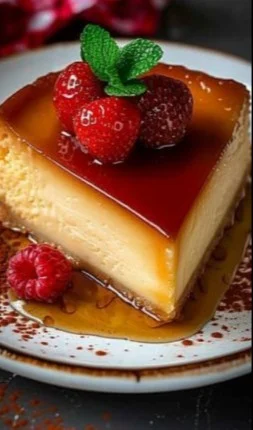
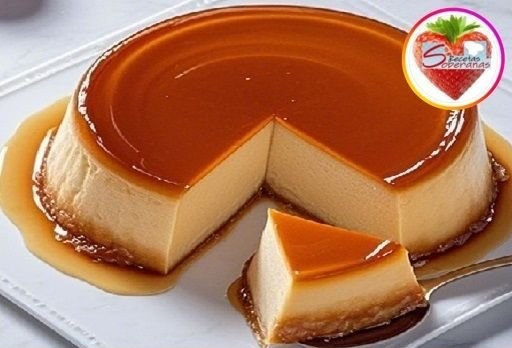
Flan de Leche Casero
Flan de Leche Casero
So you’re craving something tasty but too lazy to spend forever in the kitchen, huh? Same. If you’re anything like me, you want dessert without having to wrestle with a million ingredients and a complicated recipe. Let me introduce you to your new best friend: Flan de Leche Casero. This sweet, creamy treat is here to save the day with minimal effort and maximum flavor. So grab a spoon and let’s dive into the world of flan!
Why This Recipe is Awesome
First off, this flan recipe is a game-changer. It’s so straightforward that even if you’ve burned water before, you can pull this off. Seriously, it is idiot-proof; even I didn’t mess it up. Plus, it requires just a handful of ingredients that are practically best friends in the dairy aisle. Who can say no to that?
Not convinced yet? How about this: it tastes fancy but doesn’t require you to wear an apron and pretend you’re on a cooking show. It’s the kind of dessert that will have your friends saying, “Wow, you really went all out,” while you’re secretly wondering how many Netflix episodes you could have binge-watched instead. So let’s get cooking—flan style!
Ingredients You’ll Need
Alright, let’s cut to the chase. Here’s what you need to whip up this delicious flan:
- 1 lata de leche condensada: Sweet and comforting, kinda like a hug in a can.
- 1 lata de leche evaporada: Because why not double down on dairy and make life creamy?
- 4 huevos: Yup, you need these bad boys to hold everything together.
- 1 taza de azúcar: For that sweet, caramel goodness. Sugar is your best friend, don’t forget it.
- 1 cucharadita de esencia de vainilla: Just a splash of flavor that makes life a little sweeter.
That’s it! Simple, right? No crazy ingredients you’ve never heard of and won’t use again.
Step-by-Step Instructions
Let’s get to the fun part—the cooking! Follow these steps, and you’ll have a delicious flan in no time.
-
Precalienta el horno a 180°C. Get that oven nice and toasty. Your flan deserves to be baked in a warm hug.
-
En una sartén, derrite el azúcar a fuego medio hasta que se convierta en caramelo. Just stir it till it turns a golden brown. Caution: Don’t walk away or you’ll end up with burnt sugar, and trust me, no one wants that.
-
Vierte el caramelo en un molde para flan, cubriendo el fondo. This is your flan’s foundation. It’s like laying down the law, only tastier.
-
En una licuadora, mezcla la leche condensada, la leche evaporada, los huevos y la vainilla hasta obtener una mezcla homogénea. Blend it like you mean it. You want everything to be super smooth and creamy.
-
Vierte la mezcla sobre el caramelo en el molde. Easy peasy. Let the layers do their magic.
-
Coloca el molde en una bandeja para hornear con agua caliente (baño maría). This is the fancy term for "cook it in a water bath." It helps the flan cook evenly. Just don’t burn yourself—water and hot ovens are not the best duo!
-
Hornea durante 50-60 minutos o hasta que al insertar un cuchillo, éste salga limpio. Keep an eye on it, but feel free to take a dance break. Dessert is worth celebrating.
And now you wait… 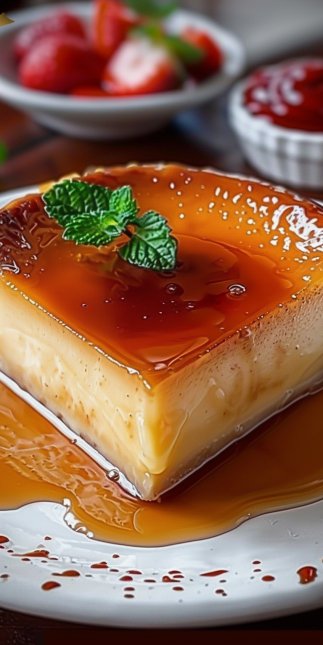
Common Mistakes to Avoid
So you’re not a flan novice? Let’s make sure you avoid some classic blunders:
-
Thinking you don’t need to preheat the oven—rookie mistake. Always preheat. Trust me. It’s like trying to jump into a pool without checking the temperature.
-
Burning the caramel because you got distracted by TikTok. I know it’s tempting, but come on. Focus just a little, okay?
-
Forgetting to grease the flan mold. This is not the time to find out your flan is about to turn into flan en pedazos.
-
Using cold ingredients. This isn’t a Polar Express situation. Room temp is your friend here.
Alternatives & Substitutions
What if you’re missing something? No worries, I got you covered with some alternatives and substitutions:
-
No evaporated milk? Use whole milk instead, and just for fun, add a bit more sugar. Who doesn’t love a little extra sweetness in their life?
-
Out of vanilla extract? No biggie. You can toss in some cinnamon or lemon zest for a different flavor kick. Just be careful not to go overboard; we want flan, not a spice explosion.
-
What if you need it gluten-free? Relax, this flan is already gluten-free. You’re good to go.
FAQ (Frequently Asked Questions)
Can I use margarine instead of butter?
Well, technically yes, but why hurt your soul like that? Just stick to the good stuff, friend.
How do I know when my flan is ready?
If a knife comes out clean, you’re golden. It’s like checking if your cake is done, only with a lot more style.
Do I have to let it cool completely before serving?
If you want to avoid molten flan, yes. It’s a patience game, but it’s worth it, trust me.
Can I make this ahead of time?
Absolutely! In fact, flan gets better as it sits in the fridge. It’s like aging fine wine, only much sweeter.
What if I want to add a twist to the flavor?
Get creative! How about coffee for a mocha flan? Or try a pinch of sea salt for that sweet-and-salty vibe.
What do I do if it cracks?
Don’t panic! Cracked flan is still delicious. Just call it “rustic.” Fancy, huh?
Can I use a different sweetener?
Sure! But be prepared for a possible flavor change. Sweet tooth in charge here.
Final Thoughts
There you have it, my flan-loving friend. Now go impress someone—or yourself—with your new culinary skills. You’ve earned it. Whether you’re preparing for a dinner party or just satisfying a sweet tooth, this flan de leche casero is sure to be your new go-to. And who knows, you might just become the dessert wizard of your household. So whip it up, dig in, and enjoy every creamy bite!
Happy flan-making!
Print
Flan de Leche Casero
- Total Time: 70 minutes
- Yield: 8 servings 1x
- Diet: Gluten-Free
Description
A quick and easy recipe for a creamy and delicious flan that impresses without requiring a ton of effort.
Ingredients
- 1 lata de leche condensada
- 1 lata de leche evaporada
- 4 huevos
- 1 taza de azúcar
- 1 cucharadita de esencia de vainilla
Instructions
- Precalienta el horno a 180°C.
- En una sartén, derrite el azúcar a fuego medio hasta que se convierta en caramelo.
- Vierte el caramelo en un molde para flan, cubriendo el fondo.
- En una licuadora, mezcla la leche condensada, la leche evaporada, los huevos y la vainilla hasta obtener una mezcla homogénea.
- Vierte la mezcla sobre el caramelo en el molde.
- Coloca el molde en una bandeja para hornear con agua caliente.
- Hornea durante 50-60 minutos o hasta que al insertar un cuchillo, éste salga limpio.
Notes
Ensure to preheat the oven and watch the caramel carefully to avoid burning. This recipe is gluten-free and allows for some ingredient swaps if necessary.
- Prep Time: 10 minutes
- Cook Time: 60 minutes
- Category: Dessert
- Method: Baking
- Cuisine: Spanish
Nutrition
- Serving Size: 1 slice
- Calories: 250
- Sugar: 30g
- Sodium: 100mg
- Fat: 8g
- Saturated Fat: 3g
- Unsaturated Fat: 5g
- Trans Fat: 0g
- Carbohydrates: 38g
- Fiber: 0g
- Protein: 5g
- Cholesterol: 150mg
Keywords: flan, dessert, easy recipe, creamy, caramel, Spanish flan